Category: Car Maintenance

advertisements
  • Renault Kangoo Won’t Start or Is Hard to Start Sometimes

    Renault Kangoo Won’t Start or Is Hard to Start Sometimes

    If your car was running fine before this issue, it’s usually the crankshaft position sensor. The crankshaft position sensor sends a signal to the ECU, which uses it to calculate when the spark plugs should fire and when the injectors should operate. If the sensor isn’t working properly, the engine will turn over but won’t start.

    I took out the crankshaft position sensor


    Cleaned it with WD-40 and contact cleaner


    Put it back in — and now my car starts like new!

    It’s just two 10mm bolts.
    You can do it too!

  • Tips for Using Car Touch Up Paint

    In this article you will learn how to use car touch up paint to repair scratches and chips on your vehicle’s paint surface. A car touch-up paint is a small pen containing a small amount of paint that matches your car color. It is available at many auto parts stores at dirt cheap price. Instead, you can also buy a car touch-up paint online via Amazon or other online auto parts store. To many people, it sounds very easy to apply touch up paint on a car’s paint surface. It is supposed to work like that but you have to apply it properly on area with scratches, rust spots or chips. Otherwise you will waste your effort. Follow the 10 tips for using car touch up paint here in order to ensure you get the best results in making your car look brand new again.

    How to Apply Car Touch Up Paint

    Basically, the process is as simple as the following three steps:

    1. Find the area with scratches, chips, rust spots or damage.
    2. Clean up the area. Remove the rust with sand paper if needed.
    3. Prime the area after it is cleaned. It is recommended to use thin coats of primer. Let it dry overnight in order to get the best result.
    4. Apply the touch up paint.
    5. Wait for at least three days and use rubbing compound to make it shine.

    See also: Customize your own car

    10 Tips for Using Car Touch Up Paint

    using car touch up paint

    Tip 1: Buy the Correct Color According to User’s Manual

    The biggest mistake in using car touch up paint is get the wrong color. There are hundreds type of red, thousands type of blue and even black. A wrong paint color will result a big contrast on your car when looking at it. Therefore, make sure you check your color code from your user’s manual or via your vehicle’s VIN number.

    Tip 2: Use Masking Tape to Protect the Surrounding Area

    Use masking tape or painter’s tap with old newspaper to protect the surrounding area. Simply apply the tape along the edges of the spot you want to paint. For small area, cut a hole in the middle of a paper and tape it on.

    Tip 3: Use the Right Sand Paper

    Remove all the rust spots with the right sand paper. For area with bad rust, use 80 or 120 grit sandpaper to sand the area. Once you feel the damage has been sanded to moderate, use 320 grit and 1000 grit to sand it until the surface looks smooth.

    Tip 4: Make Sure It’s Clean

    Use soap, grease remover and wax to clean the area you want to touch up the paint. Make sure it is 100% clean. It is easier to apply paint on a clean and dust-free area.

    Tip 5: Use Very Thin Coats of Primer

    Buy the thinnest coats of primer to apply on your car’s paint surface. Thin coats of primer is ready to spray and it doesn’t require thinning.

    New to car? Check out our Car Buying Guide and Driving categories.

    Tip 6: Test the Paint Color Match

    Use a piece of metal to test the car touch up paint you bought. Make sure the paint matches your car color before you apply it. In case you only notice the color is wrong after applied on your car, use automotive lacquer thinner to remove it quickly before it dries up.

    Tip 7: Use Good Quality Car Touch Up Paint

    There are different types of car touch up paint available in the market, for instances, paint pens, paint kits, bush cap paints and spray paints. Identify the number of damage on your car as well as how big the area is. Paint pens is good to color small dings and nicks. On the other hand, spray paints is good for larger repairs.

    Tip 8: Give Time to Dry the Paint

    72 hours is the best time for any type of paint to dry up completely. Thus, it’s recommended to leave the car in a clean garage for at least three days for the paint to dry up.

    Tip 9: Wax after Paint has Dried

    Wax the car from head to toe once to restore shine once the paint has dried. For best results, it is suggested to allow the car paint to dry for at least 30 days before waxing. The car will look brand new after waxing.

    Tip 10: Do it When Humidity is Below 50%

    Car paint dries best with the humidity below 50%. It is perfect if the temperature is at least 70 fahrenheit (21 celsius). Hence, start your spray job during this time will give you the best result.

    It’s good to experience using car touch up paint to repair your own car. You will know how to inspect a used car before buying it in the future. At least you know which area has been touched up before.

  • How to Disconnect a Car Battery

    Often, there are times where you need to store your car, reset the computer or work under car hood. Whether it is for storage, upgrade, reparation or other purposes, you need to disconnect the car battery in the correct way. Disconnect a car battery wrongly could risk electrocution and nobody wish that to be happened. Therefore, it is vital to learn how to disconnect a car battery and reconnect correctly when you want to use it.

    Tools to disconnect a car battery

    Basically, you just need a few simple tools to disconnect a car battery. They are:

    • Socket wrench
    • Socket wrench extender
    • Safety googles or protective eyewear
    • Insulated gloves

    Steps to disconnect a car battery

    Step 1: First of all, make sure you turn off the engine and remove your car key from the ignition. Make sure your vehicle is in Park (see also: Learning to drive an automatic car).

    Step 2: Open the hood and put a pad over the fender to protect it from corrosive battery acid.

    Step 3: Locate the negative terminal. Usually there will be a black cover. You can also see a negative (-) sign near to the connector post. The positive terminal usually has a red cover and a positive (+) sign near to the connector post.

    Disconnect a car battery

    Step 4: Prepare the right sized socket on your wrench and remove the nut from the negative terminal. Use a wrench extender if you need a longer wrench to reach the nut.

    Step 5: After the nut on the negative terminal is loosen, pull the negative terminal away from the battery.

    Step 6: Repeat step 4 and step 5 to remove positive terminal. It is vital to keep the positive connector away from any metal part of the car. Thus, remove is carefully. You can now reset the computer or work on your car without to risk electrocution. It is recommended to remove the car battery from the car if you are doing this for storage. See also How to winterize your car.

    To reconnect the battery when you want to use it, reconnect the negative (-) terminal first and then positive (+) terminal.

    How to disconnect a car battery without losing memory

    You will need an extra battery and a set of jumper cables if you want to disconnect your car battery without losing memory.

    Step 1: Connect both the positive and negative terminals from the extra battery to your car terminals using jumper cables. Negative to negative and positive to positive.

    How to disconnect a car battery without losing memory

    Step 2: Disconnect the negative terminal from your car battery but make sure it is still connected to the extra battery that is healthy.

    Step 3: Disconnect the positive terminal from your car battery but make sure it is still connected to the extra battery.

    Step 4: Remove every bolt or screw that are holding the car battery in place. Remove the old battery from your vehicle and replace with a new one. Clean the tray if it is dirty. Connect the positive terminal and then negative terminal to the new battery.

    Step 5: Now you can remove the jumper cable. Remove the positive cable (Red) and then only remove the negative cable (cable).

    car battery

    Almost 99 million wet-cell lead-acid car batteries are manufactured every year, thus, it is a must to dispose your old car batteries in proper way. The best way is bring it to a recycling center that accepts batteries.

  • Ford Alternator Wiring Diagrams

    Here you can download Ford alternator wiring diagrams for free. It’s vital to get the right Ford alternator wiring diagrams so that you can fix your problem without wasting time. There are many types of wiring diagram for different types of alternators. You can find the correct one according to your car model as well as model year. Some of these come with Ford alternator wiring harness too. If you are hooking up an alternator, they might be very useful.

    Simple Ford Alternator Diagram

    Ford alternator wiring diagrams
    Basically, there are a few components to be recognized when you disassemble an alternator from your engine bay. The pivot bolt, terminal end nut, voltage regulator, regulator wiring plug, and brush holder. The image above is an alternator from a 2002 Ford Ranger. It is the same for Ford F150, F250 and other Ford F-Series cars.

    Ford Alternator Wiring Diagram

    Ford alternator wiring diagrams
    This is the diagram of every components in the alternator. It is a diagram for the alternator in a Ford Focus (see also Ford Focus Repair Manual), Ford Escort, Ford F-100, Ford Taurus, Ford Mustang, Ford Model T, Ford GT40, Ford Thunderbird, Ford Shelby Cobra and other Ford cars that use the similar alternator.

    Ford Alternator Wiring Schematic

    Ford alternator wiring schematic
    This is a basic Ford alternator wiring schematic with external regulator. It consists the back view of a standard Ford alternator, with and without warning light. It is very useful if you would like to know the fused power, voltage regulator, ignition warning and others.

    See also: Free Ford F150 Repair Manual Online (PDF Download)

    Ford alternator wiring diagram internal regulator

    Ford Alternator wiring diagram internal regulator
    Among all the Ford alternator wiring diagrams above, this is the most complicated one. It consists of ignition switch, fuse panel, engine compartment relay box, instrument cluster and many more. It requires advanced knowledge to fix an alternator with this diagram.

    See also: Free Ford Wiring Diagrams, Difference between automatic and manual cars

  • How to Winterize Your Car

    While winter is around the corner, it is vital for everyone car owner to know how to winterize your car. Sometimes, it is tough to drive in winter time because of the road conditions, weather, and unexpected things that will happen during cold months. It is essential to know the basic things you need to check and prepare the best for your car before entering winter. Car parts such as tires, gasoline, brake pads, and all the fluid in your engine system play an important role during the winter. If you have no idea of what to do to your car for cold day, check out the 10 most vital things to do to winterize your car in a proper way.

    10 Tips to Winterize Your Car Correctly

    These are the 10 most important things you need to do in order to winterize your car correctly without spending extra money.

    1. Engine coolant

    It is necessary to have the right mixture of 60% coolant and 40% water in your radiator before the weather gets too cold especially if you live where temperatures get below freezing, for e.g., Alaska. The water in your radiator may turn into ice if the ratio is not right. 80% water and 20% coolant is definitely a bad idea. Your car engine will not function properly with ice in the radiator. Double check your owner’s manual or check with your mechanics for the perfect coolant mixture.

    2. Engine oil for the winter

    According to DMV, it is recommended to use thinner and less viscous engine oil during the winter. For example, if you use 10W-30 for your car in the summer, you can consider switching over to 5W-30 before entering cold months. It is highly recommended to refer to your car owner’s manual or seek for further advice from your mechanic. See also: Car engine won’t start.

    3. Measure tire tread and consider snow tires

    If your car tires are bald, replace a set of new one. To measure the tire tread, use a penny to go through the tire tread. It is time to replace a new one if you can see the Lincoln’s head. On the other hand, you can consider buying snow tires with studs if you live off the beaten path. Snow tires are built to deal with snow, ice and sleet. It can improve your car’s traction.

    4. Run a serious checking on belts and hoses

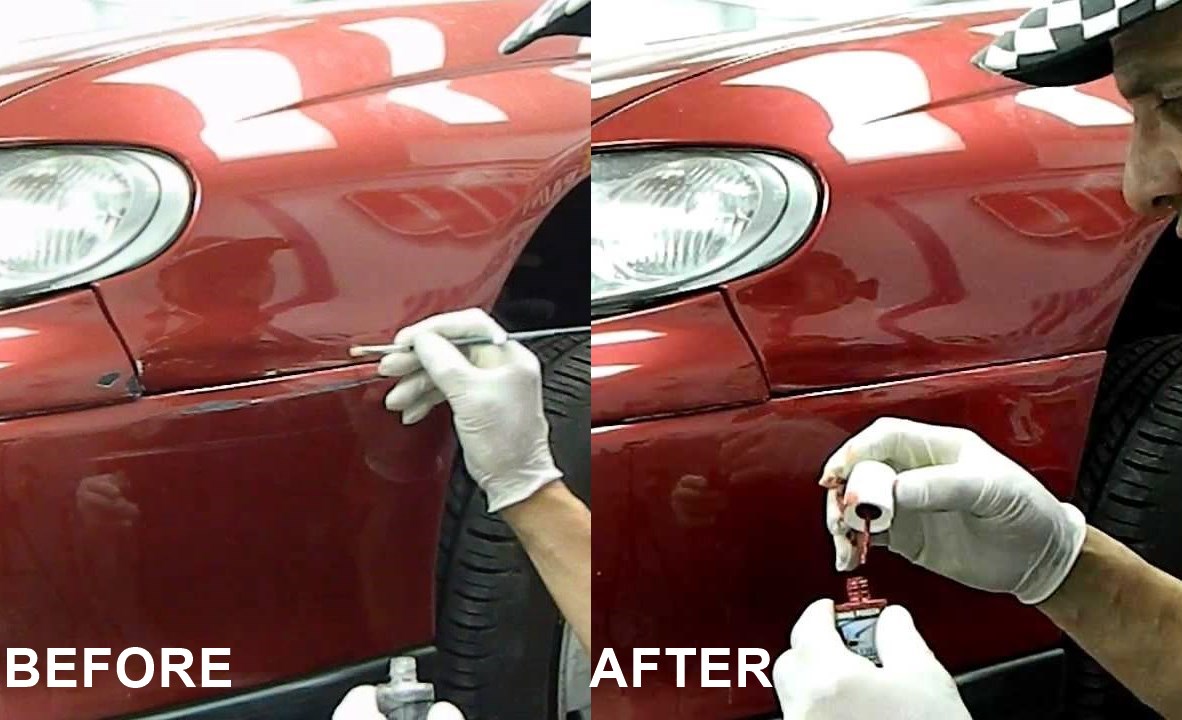
    Send your car to a trusted workshop and have your mechanic to check all the belts and hoses under your car’s hood. Replace those hoses if you see a crack on them or if you see any leaking. Hoses are cheap but if they break while you are driving, tow car will be the only way to get home.

    5. Check your battery, terminals and cables

    Weak battery is often the number one reason a car won’t start. The capacity of a battery is reduced by the cold weather. Run a complete checking on your battery, terminals, cables, fluid for any cracks and breaks. Test your car battery with a car battery tester. Replace a new car battery if it is not in healthy condition. See also: how to test a car battery.
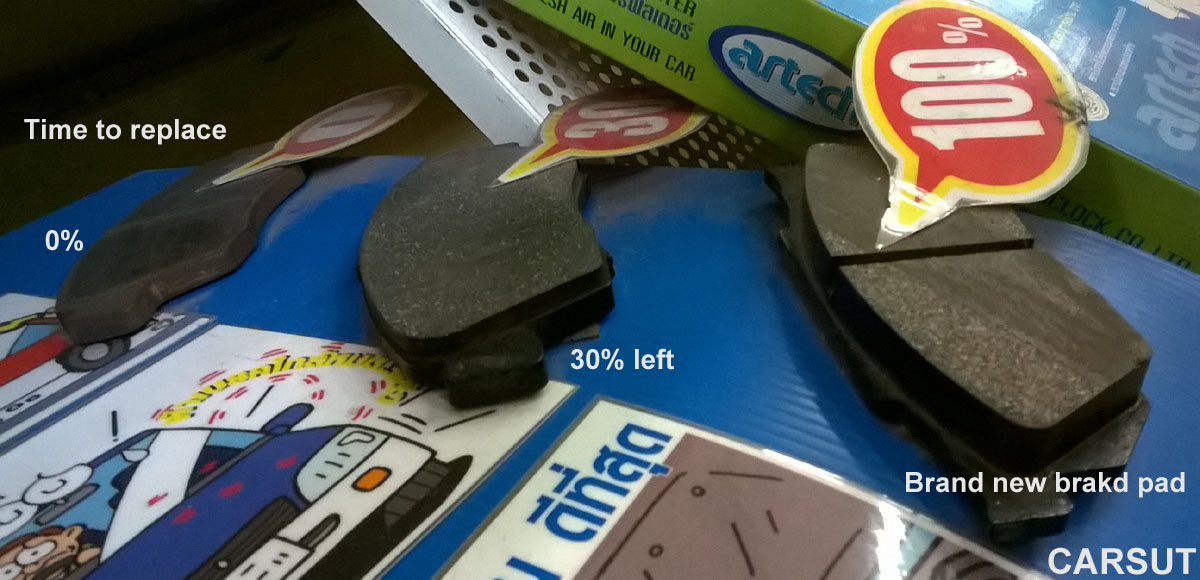
    car battery

    6. Brake pads

    It is cool to see a car accelerates from 0 to 60 mph in a few seconds but it is also important to be able to stop a car from 60 to 0 mph. Check your brake pads and see if they need to be replaced. See also: how long do brake pads last.
    brake pads

    7. Replace your windshield wipers and washer fluid

    It is tough to drive in the rain during winter time especially if you are on the road late at night. Visibility levels are definitely low and it is recommended to replace your wipers with silicon wipers if they are in bad conditions. Silicon wipers are stronger and they often last longer. Also, you are suggested to use washer fluid with an antifreeze solution.

    8. Keep a set of emergency kit in your car

    Anything can happen during winter because the weather is cold and the sky is always dark. The best way to combat with winter is to keep a set of emergency kit inside your car such as flashlights, hydraulic jack, wrench, spare tire, emergency warning triangle, extra bottles of engine oil, brake fluid, coolant, blankets, boots, bread or food as well as tools to change out a flat.

    9. Always pump your fuel tank full

    In our car maintenance guide, we often mentioned that low fuel level will lead to many problems. Fuel pump failure is just one to be mentioned. Cold weather can cause condensation to form on the walls of a near-empty gas tank, and soon water will drip down into the gas. As water is heavier than gasoline, it might travel into fuel lines and then all the way to your car engine. This will not burn the engine but it will burn your wallet.

    10. Use antifreeze

    Consider to put a right amount of antifreeze in your radiator. A 50:50 ratio is the ideal amount. Antifreeze can keep fluids from freezing at temperatures as low as -34 degrees Fahrenheit (-36.67 degrees Celsius). Pre-mixed Antifreeze is cheap and they are available almost everywhere including gas stations and some grocery stores.

    That’s the top 10 things on how to winterize your car. Please leave a message with the comment features if you think something important is missed out.